Customizing the Strapi upload plugin
Note: To directly look at the code changes to make this customization work, please check out this github repo.
1. Goal
My goal with this post is to describe how Strapi’s upload plugin can be customized to enable uploading assets to different destinations based on what the Admin UI user selects during the file upload.
Leveraging these changes, we can customize the Strapi upload plugin to do things like -
- Upload certain files to S3, while the others to a local destination.
- Set certain uploaded files as private while others as public.
- Pass additional metadata about the uploaded files to the custom upload provider.
2. Challenges with customizing the upload plugin
Modifying the schema.json for the plugin datatype models or extending the server-side API can be achieved by Strapi plugins extension. But, this does not cover customizing the Admin panel UI part of the plugin.
As a result, customizing the admin UI part for any Strapi plugin requires using patch-package. A limitation of using patch-package is that the changes need to be carefully evaluated everytime the customized plugin version is updated.
3. Steps to customize the upload plugin
3.1 Setting things up:
- Let’s create a new strapi project with
yarn create strapi-app strapi-customize-uploadto have a fresh running strapi instance.

- Since we are using
patch-packageto perform our customizations, let’s install it viayarn add patch-package
3.2 Writing a custom provider for the upload plugin:
- We want to create the custom provider within our code repository (and not as a separate npm package). So, we create it within our repository:
mkdir providers
mkdir providers/strapi-provider-upload-custom
- Next up, rather than writing the provider code from an empty slate, we can copy the code from providers/upload-aws-s3. (This means copying all the files and folders at this URL to the
providers/strapi-provider-upload-customfolder). - We now change the following within
providers/strapi-provider-upload-custom/package.json
"name": "strapi-provider-upload-custom",
"version": "0.0.1",
"description": "Custom provider for strapi-upload plugin",
- Let’s update the actual provider code so that it supports uploading to two different locations:
const S3LocationDefault = new AWS.S3({
      apiVersion: '2006-03-01',
      ...config.s3LocationDefault,
    });

const S3Location2 = new AWS.S3({
      apiVersion: '2006-03-01',
      ...config.s3Location2,
    });
- We will have the Strapi Admin UI send additional metadata (
file.uploadDestination) that will let our provider code decide where to upload a certain file:
let S3 = file.uploadDestination &&
          file.uploadDestination === 's3Location2' ?
            S3Location2 : S3LocationDefault;
- We will also make the provider store this additional information about the file within the database so that this can be used for future actions (like deleting the uploaded file):
file.provider_metadata = {
    uploadDestination: file.uploadDestination ||
        's3LocationDefault'};
- The complete modified provider file is here.
3.3 Passing config to our custom provider:
- The
config.s3LocationDefaultand theconfig.s3Location2used within our custom provider code in the previous section need to be defined within our plugin config (config/plugins.js):
module.exports = ({ env }) => ({
    // ...
    upload: {
      config: {
        provider: 'strapi-provider-upload-custom',
        providerOptions: {
            s3LocationDefault : {
                accessKeyId: env('AWS_ACCESS_KEY_ID'),
                secretAccessKey: env('AWS_ACCESS_SECRET'),
                region: env('AWS_REGION'),
                params: {
                  Bucket: env('AWS_BUCKET'),
                },
            },
            s3Location2 : {
                accessKeyId: env('AWS_ACCESS_KEY_ID_2'),
                secretAccessKey: env('AWS_ACCESS_SECRET_2'),
                region: env('AWS_REGION_2'),
                params: {
                  Bucket: env('AWS_BUCKET_2'),
                },
            },
        },
      },
    },
    // ...
  });
- We need to provide the above variables within our
.envfile. - We also need to enable our Content Security Policy to allow the files to be loaded from the two destinations by adding the following within
config/middlewares.js:
{
    name: 'strapi::security',
    config: {
      contentSecurityPolicy: {
        useDefaults: true,
        directives: {
          'connect-src': ["'self'", 'https:'],
          'img-src': ["'self'", 'data:', 'blob:', process.env.AWS_BUCKET + ".s3." + process.env.AWS_REGION + ".amazonaws.com", process.env.AWS_BUCKET + ".s3.amazonaws.com",  process.env.AWS_BUCKET_2 + ".s3." + process.env.AWS_REGION_2 + ".amazonaws.com", process.env.AWS_BUCKET_2 + ".s3.amazonaws.com"],
          'media-src': ["'self'", 'data:', 'blob:', process.env.AWS_BUCKET + ".s3." + process.env.AWS_REGION + ".amazonaws.com", process.env.AWS_BUCKET + ".s3.amazonaws.com", process.env.AWS_BUCKET_2 + ".s3." + process.env.AWS_REGION_2 + ".amazonaws.com",process.env.AWS_BUCKET_2 + ".s3.amazonaws.com"],
          upgradeInsecureRequests: null,
        }
      }
    }
  },
- We need to install the packages within the local
providers/strapi-provider-upload-customfolder viayarn install - We can now add our locally created
strapi-provider-upload-customto our Strapi setup by adding the following line within the mainpackage.json(see this file for reference):
"strapi-provider-upload-custom": "file:providers/strapi-provider-upload-custom"
- We now need to install, build and run our main Strapi setup:
yarn
yarn build
yarn develop
- We can now test if our
strapi-provider-upload-customis working as expected by trying to upload a few files via the Strapi Admin UI. At this point, all the uploaded files will go to the default S3 bucket (specified within.envAWS_BUCKETvariable).

3.4 Customizing the Upload plugin Admin UI:
- Since we are going to leverage
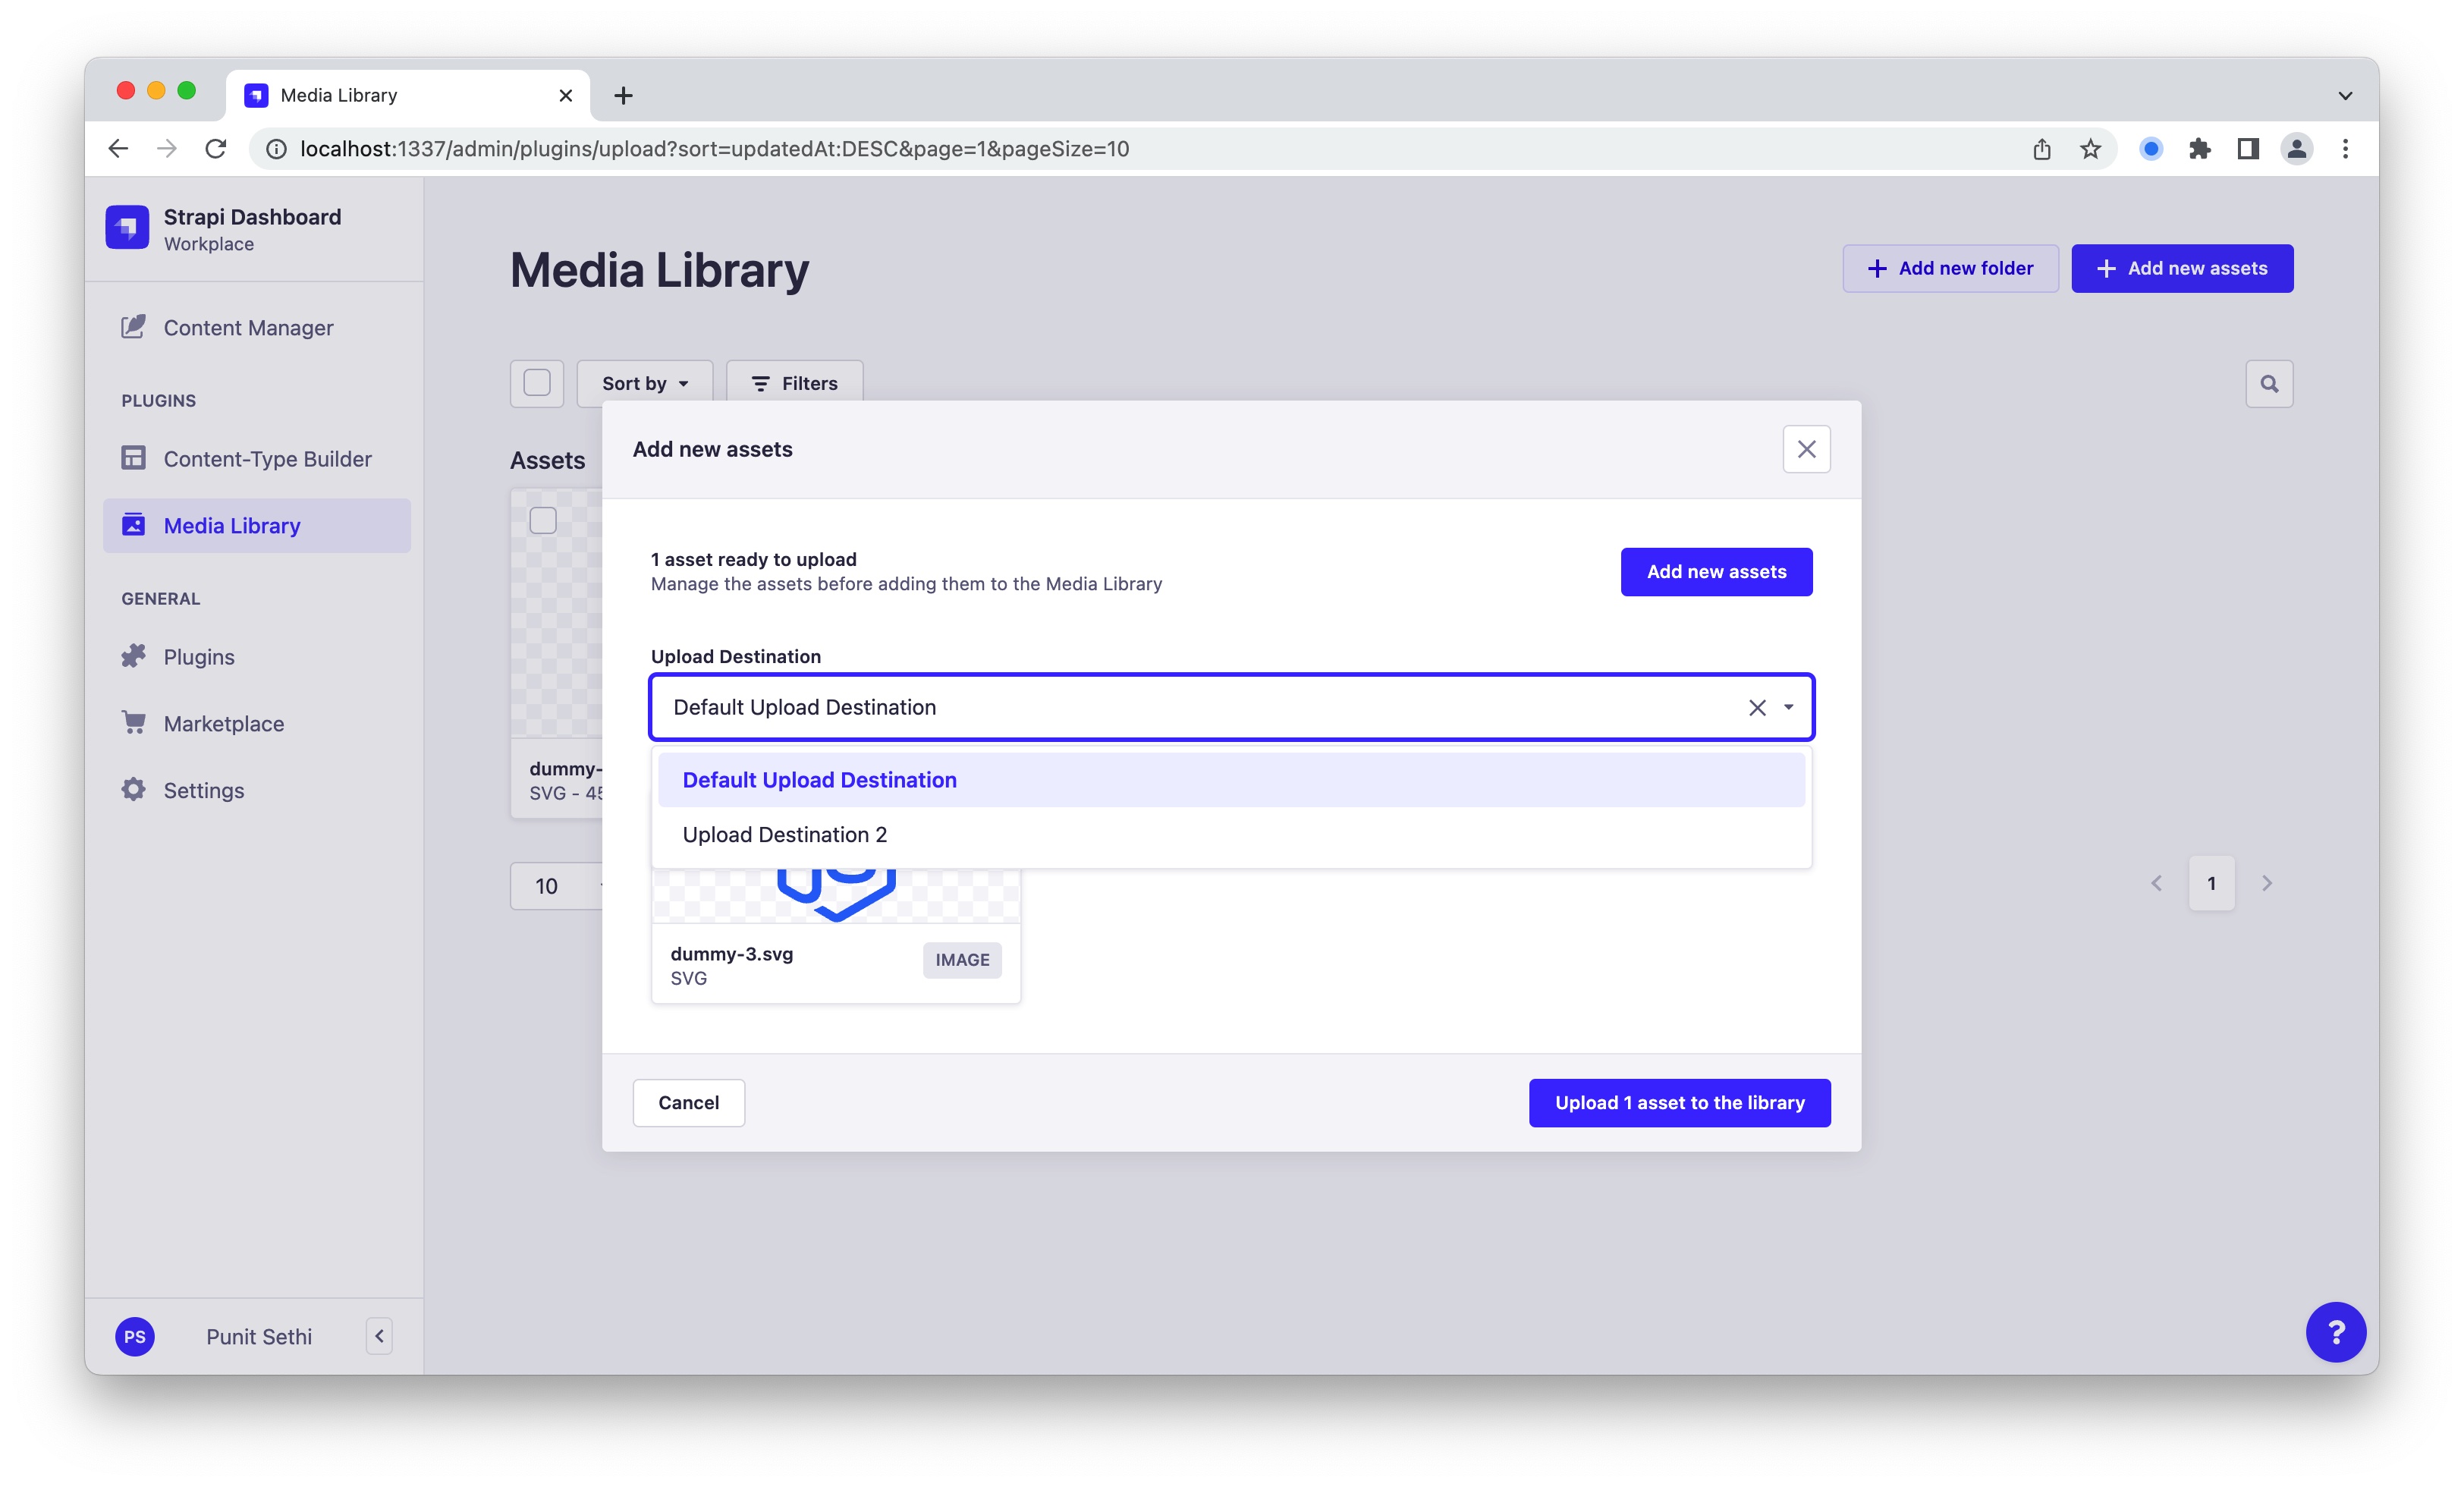
patch-packagefor this part of the customization, we need to modify thenode_modules/@strapi/plugin-uploadcode on our local setup. (I prefer opening this folder in a separate instance of my code editor). - We specifically want to add the dropdown to allow the admin user to select an upload destination:

- This change needs to go into the
admin/src/components/UploadAssetDialog/PendingAssetStep/PendingAssetStep.jsfile. - Here, we add our new field to the UI code and a React state variable to hold the value:
const UploadDestinationSelect = ({value, setValue}) => {
  return (
     <Combobox label="Upload Destination" value={value} onChange={setValue}>
          <ComboboxOption value="s3LocationDefault">Default Upload Destination</ComboboxOption>
          <ComboboxOption value="s3Location2">Upload Destination 2</ComboboxOption>
        </Combobox>
  );
}
const [selectedDestination, setSelectedDestination] = useState('s3LocationDefault');
- We then pass the selected destination to the next screen by creating a custom property
uploadDestination:
asset.uploadDestination = selectedDestination
- Next up, we modify the
plugin-upload/admin/src/hooks/useUpload.jsto pass thisasset.uploadDestinationvalue via theHTTP POSTrequest it makes to upload the selected file.
  const { rawFile, caption, name, alternativeText, uploadDestination } = asset;
  ...
  ...
    formData.append(
    'fileInfo',
    JSON.stringify({
      name,
      caption,
      alternativeText,
      folder: folderId,
      uploadDestination
    })
  );
- On the server side, the uploaded asset’s fileInfo should now be expected to contain
uploadDestination(like the rest of the properties). - On the server side, we now need to make changes so that the received
uploadDestinationgets passed to our custom provider. For this, we changeplugin-upload/server/services/upload.js.
    const entity = {
      name: usedName,
      alternativeText: fileInfo.alternativeText,
      ...
      ...
      ...
      uploadDestination: fileInfo.uploadDestination
    };
- Once the above changes are made, we run
npx patch-package @strapi/plugin-uploadto create our patch-package file (complete patch file generated can be seen here). - We now need to rebuild our Strapi admin via
yarn buildand then runyarn develop.
4. Verifying our customization:
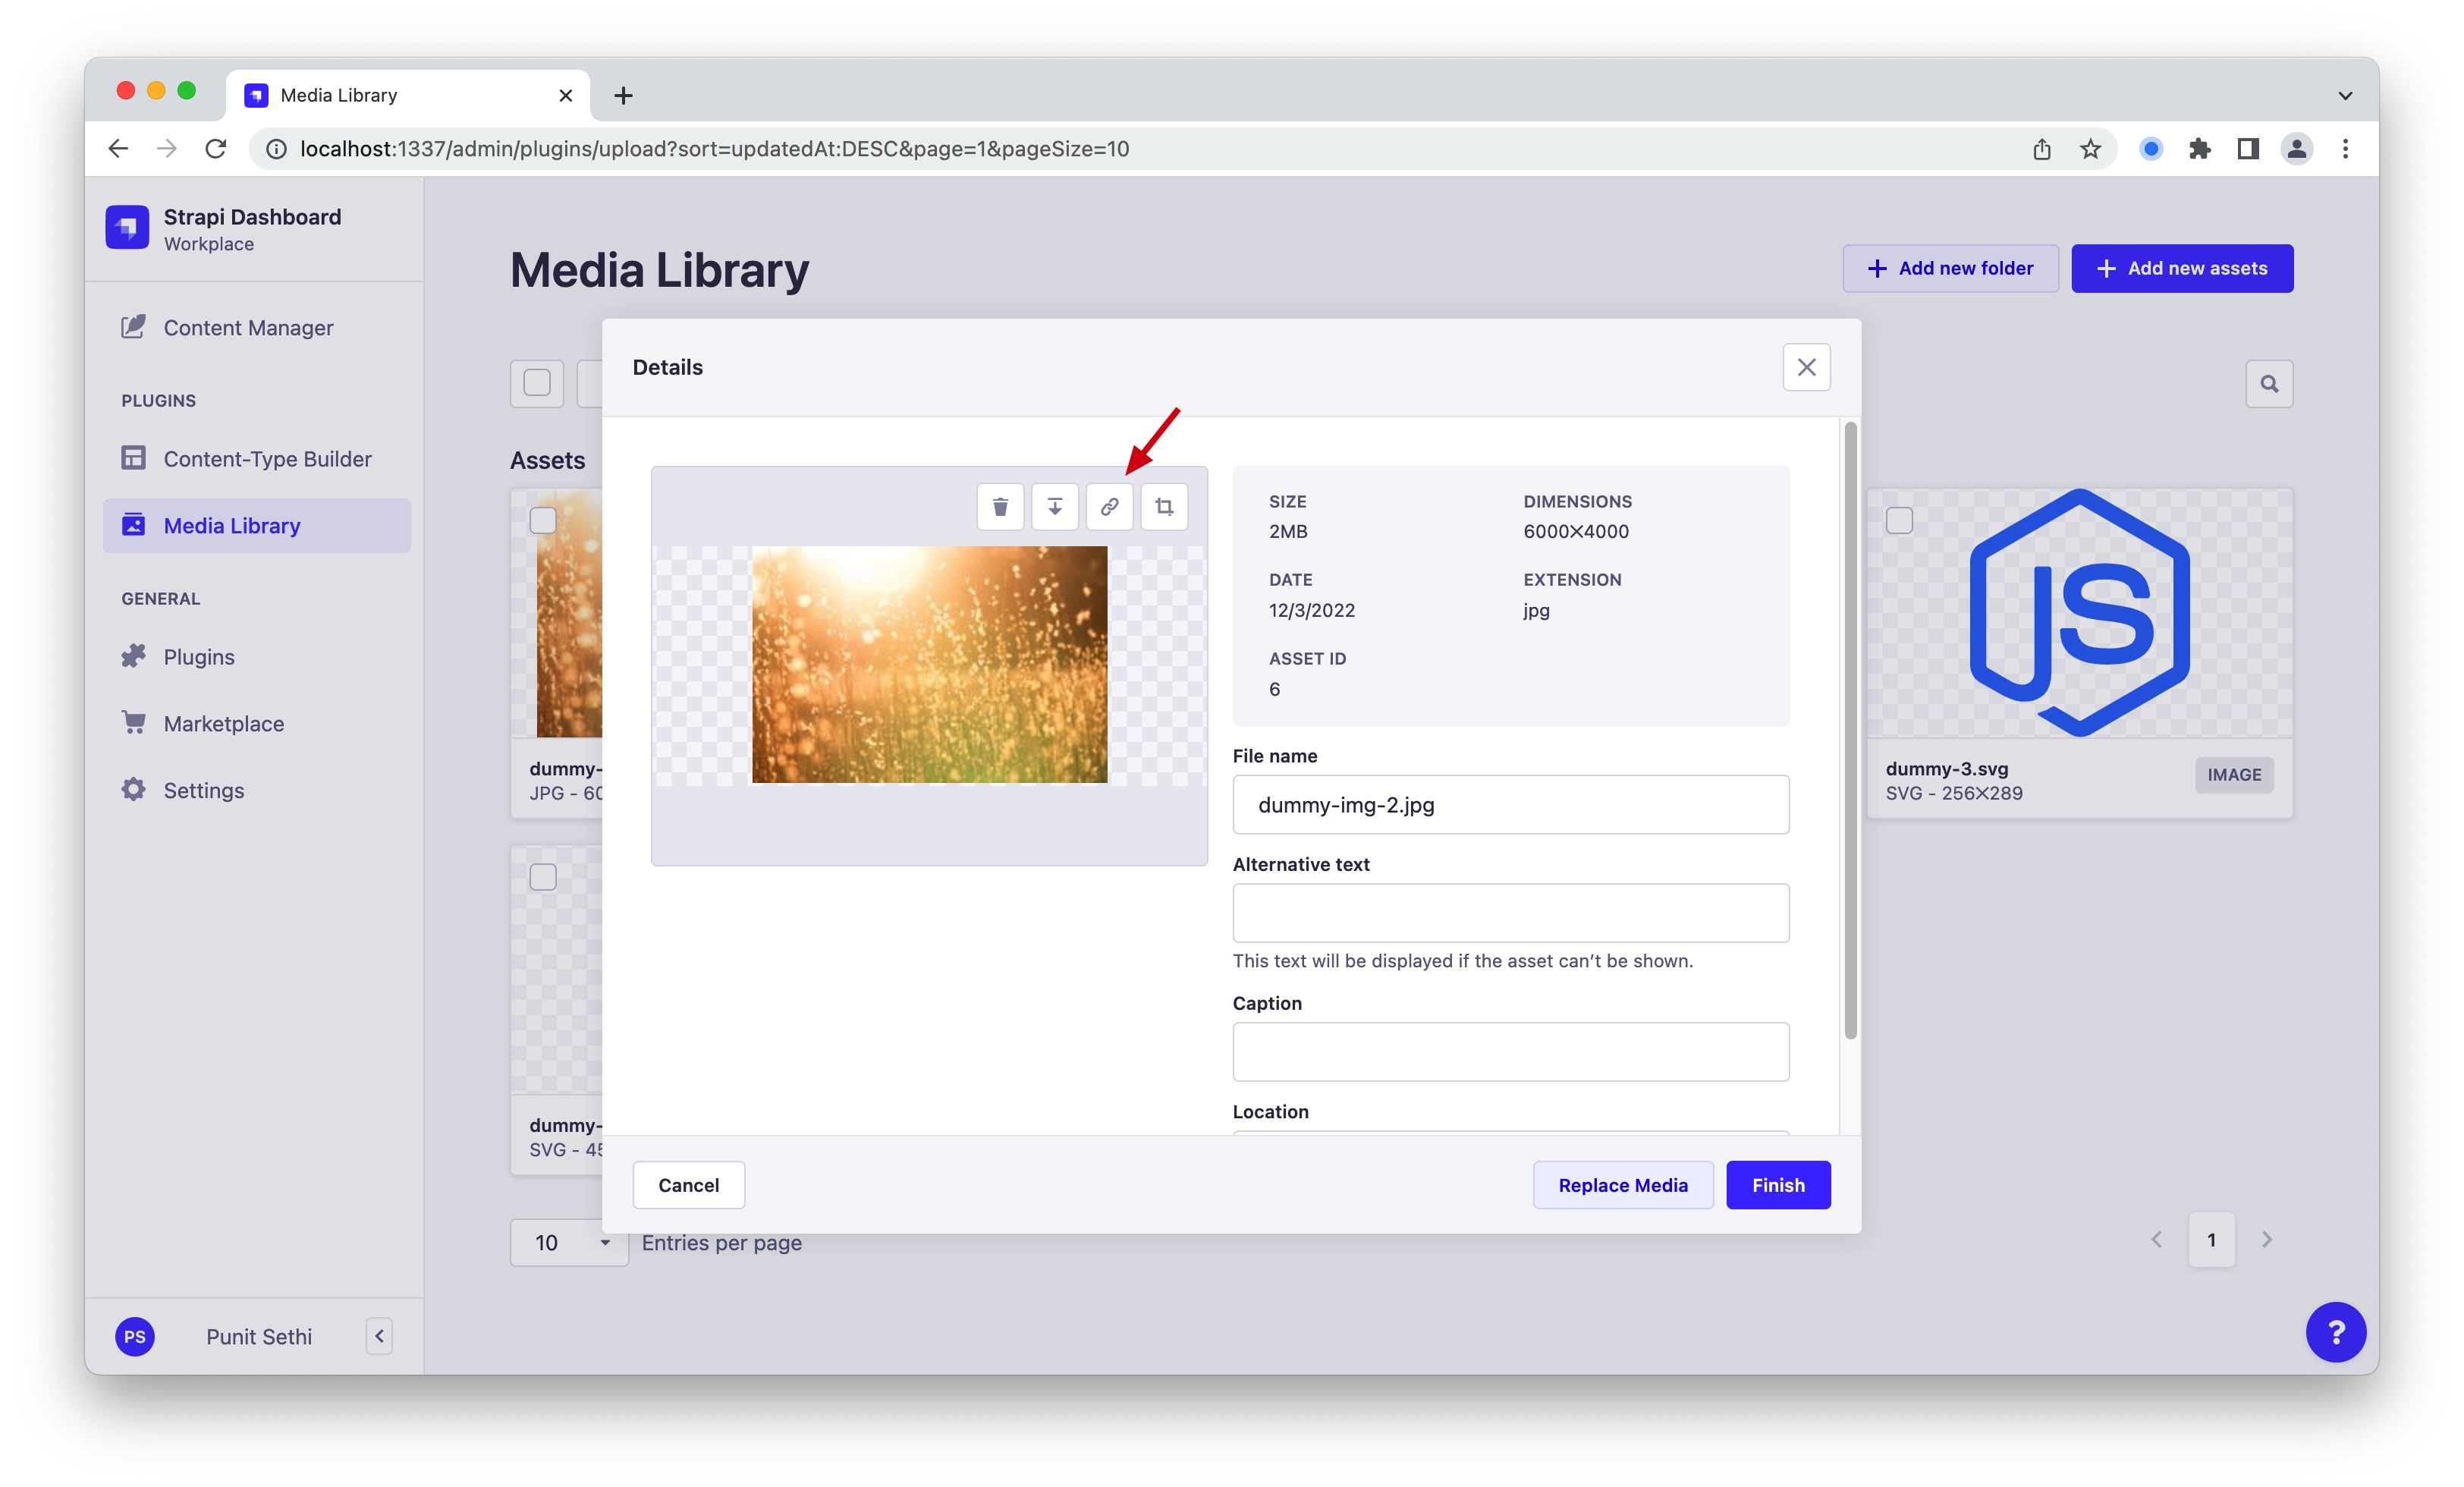
- At this point, we can check if our changes are working as expected by uploading two files via the Strapi upload plugin - one for each destination.
- We can verify the URLs of the uploaded files to confirm if things are working as expected.


Need help with Strapi setup, upgrade, or customization?
I've been a Strapi specialist since 2021 (v3).
My Strapi work includes:
- Published 2 plugins on the Strapi marketplace
- Written 4+ articles featured in the official Strapi newsletter
- Contributed fixes to the Strapi core repo
- Implemented, upgraded, and customized Strapi setups for multiple teams
My Clients Include:


Or email: punit@tezify.com

- Published 2 plugins on the Strapi marketplace
- Written 4+ articles featured in the official Strapi newsletter
- Contributed fixes to the Strapi core repo
- Implemented, upgraded, and customized Strapi setups for multiple teams
 Hire Me